Skip to content
Search
Popular Products
Spawn Fly Fish
Articulated Shanks in Multi Lengths
$5.25
Flymen Fishing
Fish-Skull Next Generation Articulated Shank
$8.95
Flymen Fishing
Next Generation Micro Shank
$8.95
Partridge
V1SS Waddington Shank
$9.45
Firehole Outdoors
Straight Shanks
$7.95 $6.74
Flymen Fishing
Fish-Skull Senyo's Articulated Shank
$9.95
homepage-hero-7

Fly Tying

Browse our library of articles for patterns, tutorials, reviews, expert advice, and more from seasoned anglers and fly tyers.
Winter fly tying for fly fishing for trout in winter

Winter Fly Tying Dubbing Blends for Midges & BWOs

Discover proven winter fly tying dubbing blends for midges and Blue-Winged Olives. Expert recipes using natural and synthetic materials for cold-water trout patterns. Shop J. Stockard's selection.
touch dubbing

Touch Dubbing: A Revolutionary Fly Tying Technique for Realistic Nymph Patterns

The Origins of Touch Dubbing and Gary LaFontaine's Double Magic By Guest Blogger, Todd Turner of Armstrong Creek Outfitters At a Chicago-area fly fishing show in the mid-90's, I had the great fortune of watching Gary LaFontaine demonstrate his Twist Nymph and share the pattern's origin story. From that experience, and over subsequent years of learning from his books and newsletters, I became a disciple of his theories of attraction and methods of imitation. His Twist Nymph and numerous other LaFontaine originals incorporate novel fly tying materials and techniques that solved riddles from his countless hours underwater observing real bugs and trout in their natural habitat. His simple Twist Nymph incorporated what he called "Double Magic"—a body made of peacock herl twisted within a loop of thread that was "touch dubbed" with his own concoction of Antron-based fly tying dubbing. See Product Why Touch Dubbing Works: Understanding the Visual Triggers Gary recognized that the reflective properties of Antron fibers closely mimic the visual triggers of trapped air bubbles that help lift many emerging pupa toward the surface. He witnessed feeding trout selectively key in on these visual features. Benefits of Touch Dubbing for Fly Tying As I have developed my own patterns over the years, almost all of my nymph, larva, and pupa imitations use touch dubbing in some component—as both a technique and special fly tying material. I believe that touch dubbing, underwater, produces a look of life and struggle and motion which indicate opportunity to a trout. Key Advantages of the Touch Dubbing Method Subtle realism: Adds a subtle glint without producing unnatural flash Sparse application: Creates the life-effect without adding unnatural bulk, particularly on tiny patterns Natural proportions: Avoids over-dressing common to many patterns compared to svelte natural insects How to Make Touch Dubbing: Materials and Preparation Selecting the Right Fly Tying Dubbing Material There are a couple of important key steps to the touch dubbing method: dubbing fiber selection, application to the thread, and applying fly tying dubbing to the hook. Critical requirement: You need fly tying material with very short fiber length, usually 1/4" or smaller. Most synthetic and many natural dubbing fibers have fiber lengths of an inch or more and are unsuitable for touch dubbing straight out of the pack, so you need to cut it. Creating Custom Touch Dubbing Blends Over the past few years, I have been making my own blends of touch dubbing which allows me to create the color and effect I'm trying to achieve for particular patterns. All of my blends contain some Antron. Step-by-step process: Pull a section of dubbing from the pack Align the fibers in small clumps Place the clump in a clip (or your fingers) Cut the clump into quarter-inch sections Blend and fluff it in a spice grinder Processing time: About 20 minutes per pack Touch Dubbing Blend Recipes for Different Patterns Big Easy Midge Pupa: Pure Antron to create a faint veil extending back over the thorax, imitating writhing struggling wing buds and legs Baetis nymph legs: All-Antron application Caddis pupa and scud patterns: Touch-dubbed rib on the abdomen Sowbug blend: Short hairs from cream snowshoe hare's feet pads added to an Antron base Caddis pupa thorax: Includes spikey hare's mask, squirrel, or Australian possum for added bulk and flow If you're not excited about making your own touch dubbing, Al and Gretchen Beatty (btsflyfishing.com) produce ready-to-go touch dubbing called "Double Magic." Touch Dubbing Technique: Step-by-Step Instructions Basic Touch Dubbing Method The typical technique for touch dubbing follows these steps: Apply wax: Tap soft tacky wax (I use Overton's Wonder Wax) along a length of thread Add dubbing: Dab a wad of touch dubbing material along the waxed thread so thin fibers stick Distribute fibers: Spin your bobbin just a few rotations to distribute fibers around the thread Wrap onto hook: Wrap the flocked thread onto the hook—it's very simple Critical Touch Dubbing Technique Tips Important nuance: Don't spin the dubbing fibers around the thread with your fingers like you would to create a traditional dubbing noodle. Simply start wrapping the flocked thread onto the hook. The thread wraps bind many, but not all fibers to the hook. As you wrap the thread, preen the fibers on the hook rearward as you go forward to avoid matting down too many fibers with successive wraps. Some fibers come off as you proceed and preen, but that's part of the idea. Less is much more. You're trying to create a sparse veil-type effect that allows light to show through, traps some air and creates a few bubbles underwater, and adds life-like chaos to the pattern. Advanced Touch Dubbing: The Split Thread Technique A couple of months ago, I started using a split thread technique for touch dubbing which gives more surface area to grab more fibers and holds on better to the fly tying dubbing while you wrap it to the hook. This method gives better control over the amount of fibers that end up on the finished fly. How to Split Fine Thread for Touch Dubbing I typically use Semperfli 18/0 Nano Silk, which is awesome because it's so strong and adds so little bulk, but it's very fine stuff and a little tough to split easily. Keys to splitting small thread: Use magnifying glass or powerful reading glasses Use high-quality, very sharp dubbing needle or bodkin Flatten the thread with your fingernail to give a broader target Practice consistently (it took me a few weeks to master 18/0) Complementary Fly Tying Materials for Touch Dubbing Patterns Take a look at photos and videos of my Big Easy Scud that show how I make and use touch dubbing to create simple and realistic imitations. I use a material called Stretch Glass by Sybai as the base material for all my midge, caddis, and small mayfly larva, pupae, and nymphs. It's a little hard to find, but worth the search. You can use various "Scud Back" type fly tying materials, but they're not quite as easy to use for me. Design Philosophy: Creating Life-Like Fly Patterns Principles for Effective Fly Design I believe in subtlety, sparseness, natural proportions, and simplicity. I always start my pattern design with the real bug, and I share Gary's reliance upon first-hand observation. I love catching trout stream bugs and taking macro pictures and videos to reference in my pattern development. When I'm unable to get a stream sample myself, I search in books, magazines, and online for pictures or videos of insects I'm trying to imitate. Recommended Resources for Pattern Development Regarding midges, Midge Magic, published in 2001 by Don Holbrook and Ed Koch, provides wonderful macro photos of midge pupae and larvae that were pumped from fish that were released unharmed. These are bugs that fish ate. The color variety and detail in these images led to my creating the Big Easy Midge series. My Pattern Development Process Whenever I come up with a new idea: Start with a little sketch Tie the bug Attach it to tippet Put it in a glass of water to see how it looks Presentation Tips: Adding Life to Your Touch Dubbed Flies When I'm fishing, I add life to my presentation by attaching the fly to the tippet using a Uni-knot, leaving a very small open loop at the hook eye so the fly can swing more freely in the current. I hope you have a chance to try these touch dubbing techniques and find them as successful as I do.
Fly Tying Hooks

Your Ultimate Guide to Choosing the Right Fly Tying Hooks

Learn hook uses for dry flies, nymphs, streamers, and more to elevate your fly tying at J. Stockard Fly Fishing.
Fly Tying Hook

Understanding Every Aspect Of A Fly Tying Hook

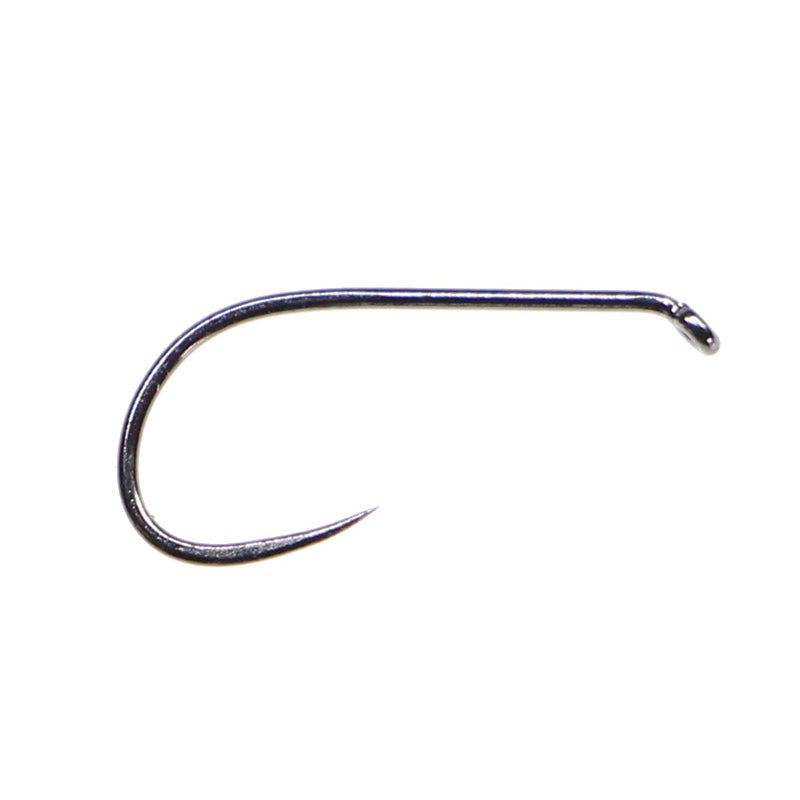
Most fly tyers select hooks based on size and style alone, without fully understanding the nuanced anatomy that makes each hook perform differently in a fly. Read on:  The Essential Components Of Fly Tying Hooks The Eye The eye is where your tippet or leader connects to the hook, and its orientation significantly affects fly presentation. Up-eye hooks (common in dry flies) help the fly ride higher on the water's surface. Down-eye hooks are versatile workhorses used in nymphs and wet flies, while straight-eye hooks offer neutral positioning ideal for streamers and certain specialty patterns. The eye's shape matters too. Ring eyes are standard, but looped eyes provide extra strength for larger patterns.  See Product See Product See Product The Shank The shank is the straight section between the eye and the bend. Its length dictates your fly's profile and silhouette. Standard shank hooks match traditional proportions, while long shank hooks (2X, 3X, or even 4X long) let you tie extended-body patterns like streamers and damselfly nymphs. Short shank hooks are perfect for compact patterns like scuds and eggs. The shank's weight also varies. Standard wire works for most applications, but heavy wire (2X or 3X heavy) helps nymphs sink faster and is needed for toothy critters, while light wire (1X or 2X fine) keeps dry flies floating delicately. The Bend The bend is where the hook curves, and it's crucial to hook-setting success. Round bends offer classic proportions and reliable hooking. Wide gape bends create more space between the point and shank, improving hook-up ratios on short strikes or oddly shaped patterns such as crabs and crustaceans. Continuous bends flow smoothly from shank to point, while offset bends feature a slight twist that can improve penetration. Popular bend styles include: Sproat bend: Wide and round, excellent for dry flies Aberdeen bend: Long, sweeping curve with light wire, perfect for live bait and delicate presentations where you want minimal damage Round bend: Classic semicircular shape, versatile for nearly any pattern from dries to nymphs Bend Back: Sharp reverse angle that brings the point back toward the shank, designed for weedless fishing through heavy cover Limerick bend: Gradual curve, great for wet flies and nymphs York bend: Tighter curve, ideal for smaller patterns The Ultimate Guide To Fly Tying Hooks Read more Choosing the Right Hook Size for Every Fly Read more The Point The business end of any hook, the point must penetrate quickly and hold securely. Needle points are extremely sharp but can dull quickly. Spear points offer a good balance of sharpness and durability. Rolled points turn slightly inward for better penetration, while hollow points create a cutting edge that slices through tough jaw tissue. Premium hooks often feature chemically sharpened points that are sharper than mechanically sharpened alternatives and maintain their edge longer. The Barb The small projection below the point, the barb prevents the hook from backing out. While traditional barbed hooks offer security, many trout anglers prefer barbless hooks or pinch down barbs for easier catch-and-release (and hook removal should you pin yourself or your boat buddy!). Micro-barbed hooks split the difference, offering some holding power with less fish damage. The Gape The gape is the distance between the point and the shank. The 'gap' in essence. Wider gapes improve hooking percentages, especially on fast-striking fish or patterns with bulky bodies such as crab and crustacean patterns. Narrow gapes work well for sparse patterns where you want the hook to remain subtle but you might compromise on hook-up rates. Gape is an on-going debate among fly-fishers and one of those things that comes down to confidence... You know what we mean - fish something with confidence and it works.  Matching Hooks to Patterns Understanding anatomy helps you select the perfect hook for each fly. Delicate mayfly emergers demand light-wire, wide-gape hooks with up-eyes. Weighted stonefly nymphs need heavy-wire, long-shank hooks with down-eyes. Streamers benefit from stout, straight-eye hooks with generous gapes. Now is a great time to stock up on Fly Tying Hooks:  SHOP THE HOOK SALE
Wes Penny

How To Tie An Award-Winning Fly With Wes Penny

Learn Wes Penny's step-by-step process, contest advice, and simple iPhone setup for capturing award-winning patterns.
Fly Tying Scissors

Everything You Need To Know About Fly Tying Scissors

Every tyer has that one pair of scissors. You pick them up without thinking, they close with zero drag, and the cut is clean enough that there's no need to check it before moving on. For many tyers, these are something like beat-up Dr. Slick Arrow Points or similar that have been owned for eight years and probably should have been replaced three years ago. But they feel right. And that feeling isn't magic, it’s metallurgy, blade geometry, serration patterns, and spring tension working together in ways most people never think about. Shop Tools and Scissors on Discount Until something goes wrong. Until you're trimming CDC and crushing fibers instead of cutting them. Until your synthetics slip out from between the blades. Until your hand cramps after an hour because the pivot screw is overtightened and you're fighting the scissors instead of using them. We went down the rabbit hole a bit and examined nine different pairs of scissors across three categories of materials. What we learned is going to save you money and frustration: scissors aren't just "sharp or dull." They're precision instruments engineered to behave differently depending on what's in your vise and what you're trying to cut. Blade Geometry Let's start with the thing that matters most and gets discussed least: blade geometry. Not sharpness but shape… The angle, grind, and profile of the blade from the pivot screw to the tip. Most fly-tying scissors use one of two grinds, and the difference is dramatic once you know what you're looking at. Hollow-ground (concave) blades are common on fine scissors designed for delicate work. The blade curves inward, creating a thinner edge with less metal behind it. This reduces friction and allows the blades to meet precisely along their cutting edge with minimal pressure. Think of it like a razor blade. We had a look at the Renomed's Elite Curved scissors, which feature a pronounced hollow grind. Cutting CDC, hackle fibers, and even thread required almost no hand pressure. The blades glided together. It is the closest thing to cutting with a surgical scalpel you’re likely to experience in fly tying. The downside? Drop these on concrete and you'll chip the edge. The thin profile that makes them razor-sharp also makes them fragile. Flat or convex-ground blades have more metal behind the edge, making them stronger and more durable. These are what you want for coarse synthetics, wire (though you shouldn't be cutting wire with your good scissors), or deer hair, where the edge needs to withstand compression and resist chipping. If you were to, say, compare 200 clumps of deer hair cut with hollow-ground versus flat-ground Dr. Slick MicroTip scissors, the difference becomes clear. Hollow-ground scissors are eventually going to show visible edge wear, while flat-ground scissors continue performing well beyond 200. With deer hair, crushing and cutting happen simultaneously, making blade geometry about durability rather than finesse. Here's what it means practically: a lower-angle grind (around 30° total) gives a razor edge—surgical, precise, but delicate. A higher angle (40°+) sacrifices some initial keenness for edge life and toughness. It's like choosing between a scalpel and garden shears. Each has its moment, and pretending one is always better misses the point. Tyers working mostly with size 16 and smaller with delicate materials will find the hollow-grind upgrade worth every dollar. Those tying streamers, saltwater patterns, or anything with hair will find the flat grind serves better and lasts longer. Must-Have Fly Tying Scissors for Precision Read more Choosing a Style of Fly Tying Scissors Read more Serrated vs. Razor The question isn't "which is better?" It's "what are you cutting?" Micro-serrated blades have tiny teeth ground into one or both edges. They bite into slick materials—synthetics like EP Fibers, Flashabou, or GSP thread—and keep them from sliding away before the cut completes. They're also excellent for tough natural hair like bucktail, moose mane, and elk that can slip against smooth blades. If you were to do a comparative test between Loon's Ergo Prime scissors with micro-serrated edges against straight razor-edged Dr. Slick Arrow Points on EP Fibers you would see clear differences. Serrated blades grip and cut cleanly every time. Razor blades can slip, requiring repositioning and retry attempts. But flip the materials to CDC or delicate hackle, and the story reverses. Serrations catch on soft fibers, requiring pulling the scissors closed rather than letting them slice. That pulling crushes the material. Razor-edged scissors shear through cleanly with zero resistance. Razor-edged blades have no serrations—just a continuous mirror-polished edge. They excel where compression or fraying must be avoided. Trimming CDC, quills, or hackle stems? You need razor edges. There's no substitute. The truth is that most tyers should own both. A serrated pair) for rough shaping and synthetics, and a fine razor pair for final trims and delicate work. Using serrated scissors on CDC is like using a chainsaw for surgery. Using razor scissors on synthetics is like trying to cut a tomato with a dull knife—eventually successful, but frustrating and imprecise. The compromise option—and what many find themselves reaching for most often—is a hybrid design with one serrated blade and one smooth blade. Loon's Razor Scissors use this approach. The serrated blade grabs synthetics while the smooth blade releases cleanly, giving acceptable performance on everything without excelling at anything. For those buying only one pair of scissors, this is probably the smart play. Spring Strength and Pivot Tension The pivot screw is where everything comes together or falls apart. This is the heart of the scissor, where torque meets precision. Over-tighten it, and fine tips get crushed or hands fatigue after an hour. Too loose, and the materials get frayed instead of cut. Tight tension requires significantly more hand pressure to close the blades and could lead to hand fatigue during extended sessions. But tight tension keeps blades perfectly aligned under force, which matters when cutting heavy synthetics or hair that wants to push the blades apart. Light tension lets blades close with minimal pressure, ideal for controlled micro-cuts on delicate materials. But when cutting deer hair or synthetics, blades can occasionally misalign slightly, resulting in crushed fibers instead of clean cuts. High-end scissors like the Loon Ergo Prime Scissors use adjustable tension screws, sometimes with a micro-slotted design, allowing tuning of the feel. For delicate work, lighter tension can be dialed in. For bulk work, slightly tighter settings work better. This adjustability is the difference between scissors that work for all tying and scissors that excel at one thing. Dr. Slick's Razor Scissors feature an adjustable tension system that can be tweaked depending on what's being tied. Streamers get tighter tension. Dry flies get looser. Adjustment takes about three seconds and makes a real difference in hand fatigue over long sessions. See Product See Product Likely Buyers Tyers working mostly dry flies and nymphs with traditional materials will find Dr. Slick Arrow Points ideal. They're sharp enough for delicate work, durable enough for general use, and affordable enough for actual use instead of babying them. Streamer specialists working with synthetics should invest in both micro-serrated scissors for bulk cutting and razor-edged scissors for final trims. The Loon Razor Scissors with adjustable tension split the difference nicely. Professional tyers or high-volume producers will find tungsten carbide models pay for themselves in reduced sharpening and replacement costs. Edge retention matters when cutting materials all day. Occasional tyers who just want scissors that work without obsessing over specs should grab a mid-range pair and move on. They'll be fine. Nobody needs five pairs of scissors at different price points. But understanding what blade geometry, serrations, and steel grades actually do—and matching those features to what gets tied—will improve tying. Not because better scissors magically improve skills, but because the right tool stops fighting and lets focus shift to the fly instead of the cut.
ON THE VISE: Mastering Body Taper & Ribbing

ON THE VISE: Mastering Body Taper & Ribbing

Master Fly Tying with Rotational Vise Techniques for Perfect Tapers & Ribbing
Semperfli ABC creator Andy Kitchener

Andy Kitchener Talks ABCs, Innovation & the Future of Fly Tying

Discover how Semperfli’s Andy’s Bugs and Creatures (ABCs) are transforming fly tying. Andy Kitchener shares insights on innovation, sustainable materials, and why ABCs are the future of tying realistic, fish-catching flies.
Mason Hard Mono

The Mason Hard Mono Foundation: A Dave Whitlock Innovation for Durable Fly Construction

Learn how to use Mason hard mono and Zap-A-Gap to create Dave Whitlock's base for durable, long-lasting flies. With expert tips from Jeff Rowley.
Showing 27 of 94

Your Cart ( 0 )

You're $100.00 away from free standard shipping
0
Your cart is currently empty.